Richard Rosen's Asana Breakdown: Sālamba Śīrşāsana 1

Sālamba Śīrşāsana 1 (Supported Headstand)

sa = with 

alamba = support

śīrşa = head

asana = literally, seat, but usually interpreted as pose or posture

Headstand is one of the most iconic of all the yoga postures. But if performed improperly, it’s potentially one of the most dangerous. In fact, there’s a good deal of controversy surrounding both Headstand and Shoulderstand. There are a number of teachers who refuse to teach these poses, maintaining the vertebrae of the neck aren’t meant to support the weight of the body. If you’re just beginning to practice this posture, we strongly advise you to follow our directions carefully, and be sure not to cut corners. If performed properly, Headstand is an exhilarating, invigorating pose. This breakdown provides instructions for beginning Headstanders. 

Headstand is a pose that needs regular practice, at least 4 to 5 times a week. If you don’t think you can manage that, it would be better then to buy a U-shaped, padded Headstand bench, which runs anywhere from about $35 to $90. With the bench, the weight of your body is supported on your shoulders while your head hangs free. That will take any pressure off the neck and approximate the benefits of the full pose.


PROPS

Beginning Headstanders should practice against a wall. Learning how to balance in this pose usually takes some time, so at first the wall will provide support. Be sure the area of the wall you intend to use is free of hanging pictures and other objects. You’ll also need a firm blanket, preferably made of cotton, wool, or wool-like synthetic material, to pad your crown and forearms. Fold this blanket into a rectangle about 2 feet by 3 feet and position one of the long edges against the wall. You might cover the half-blanket away from the wall with a sticky mat, that will help prevent the elbows from sliding apart. Finally you’ll need a watch or clock to time your stay in the pose.


1. Interlace your fingers and tuck the bottom-most pinky into the other hand’s palm. You might make a habit of alternating the lacing of the fingers day by day. For the beginning practice press the bases of the palms together. 

2. Kneel on the floor and press your forearms onto the blanket, knuckles an inch or two away from the wall, inner wrists perpendicular to the floor. Start with the elbows a few inches apart, then scrub them away from each other to shoulder width. Keep the inner wrists perpendicular and press down firmly through the inner elbows. At this point, your head is off the floor.

3. Straighten your legs and step one foot closer to the elbows (for this instruction, we’ll say the bent-knee leg is the right). To lift up into the pose, keep the left leg very straight, and with an exhale, swing the long left leg up and kick off the right with a sharp exhalation. Be prepared for one of two possibilities. 1) The swing and the kick aren’t enough to launch you up against the wall, and you drop back to the floor. Be sure to keep the swinging leg very strong, try not to let it bend. It may take some time before you get the hang of it and can kick up successfully. 2) The swing and the kick are overly strong and you thump heavily against the wall, alarming anyone on the other side of the wall. You’ll then have to learn how to moderate your swing and kick. But at least you’re up. 

4. THIS IS INSTRUCTION IS CRUCIAL. Beginning headstanders SHOULD NOT have their head on the floor when kicking up. This will prevent any sudden and/or unequal pressure on the neck. Once you’re vertical and your heels are against the wall, then you can lower your crown LIGHTLY to the floor, but most of your weight should be borne by your shoulders and arms. 

5. Press your heels strongly up along the wall, thighs turned slightly in. Ideally your tail bone is lifting to the heels to help lengthen the lower back. Firm your shoulder blades against and widen them across your back. Continue pressing down with the inner elbows, and try to distribute the weight on the forearms evenly from elbows to wrists. 

6. To start, stay in the pose for about 20 to 30 seconds. VERY GRADUALLY increase your stay by 5 to 10 seconds a week, aiming for a total stay of about 3 minutes. Simultaneously, allow a little more weight to rest on your head and neck, but continue to bear the most weight on your shoulders and arms. 

7. When coming out of the pose, LIFT YOUR HEAD OFF THE FLOOR. Just as you went into the pose with your head elevated, so should you exit. Be sure you have enough strength to do this. If you stay, for example, 30 seconds at first but can’t lift your head, for the next practice stay a shorter time, maybe 20 to 25 seconds. When coming down, you can lean your buttocks on the wall, bend your knees and roll down with an exhalation. Assume Child’s Pose for 30 seconds to a minute. 

CONTRA-INDICATIONS

Obviously, if you have physical issues with your neck, the full pose will probably not be for you. It’s best if you practice then on a Headstand bench. The pose is also not recommended for people with high blood pressure, glaucoma, and women who are menstruating. 

PRACTICE TIP

When you can lift into the pose smoothly and can safely bear a little more weight on your head, you can begin to learn how to balance. Position your head the length of your foreleg (or shin) away from the wall. Exhale, kick up, and immediately touch your feet to the wall, forelegs more or less parallel to the floor. If you’ve placed your head properly, your torso and thighs will be perpendicular to the floor, so your thighs and forelegs make a right angle. Now take one foot off the wall and stretch up through the heel. Hold for a few seconds, then return the foot to the wall and repeat with the other foot. Finally, if you’re feeling adventurous, take both feet off and strengthen your legs through the heels.

With Headstand, always remember the 3 P’s: practice, perseverance, and patience. Don’t be in a hurry to reach the 3-minute mark. You might let your regular teacher know you’ve embarked on the Headstand journey, and check in with her/him periodically with any issues or concerns.

Richard Rosen's Asana Breakdown: Bakasana

It’s been a difficult two years for most everyone, some more than others. This is the season when it’s customary to give our thanks for being alive in this beautiful world, and we’ll be excused if our Thank You lists are rather shorter than usual. But I think we can all agree there’s one thing we can all be enormously thankful for, and that’s the far-beyond-the-call-of-duty efforts made by Kim, her staff (especially her right-hand person, Laura, every studio owner’s dream manager), and the great faculty at Nest Yoga for keeping the place going and thriving when so many other schools threw in their sweaty towels. If you get the chance, be sure to let whoever you run across how thankful you are for their invaluable contributions to our Nest community. Oh, and if any teachers are reading this, be sure to thank all your wonderful students for sticky matting with us through thin and thinner.

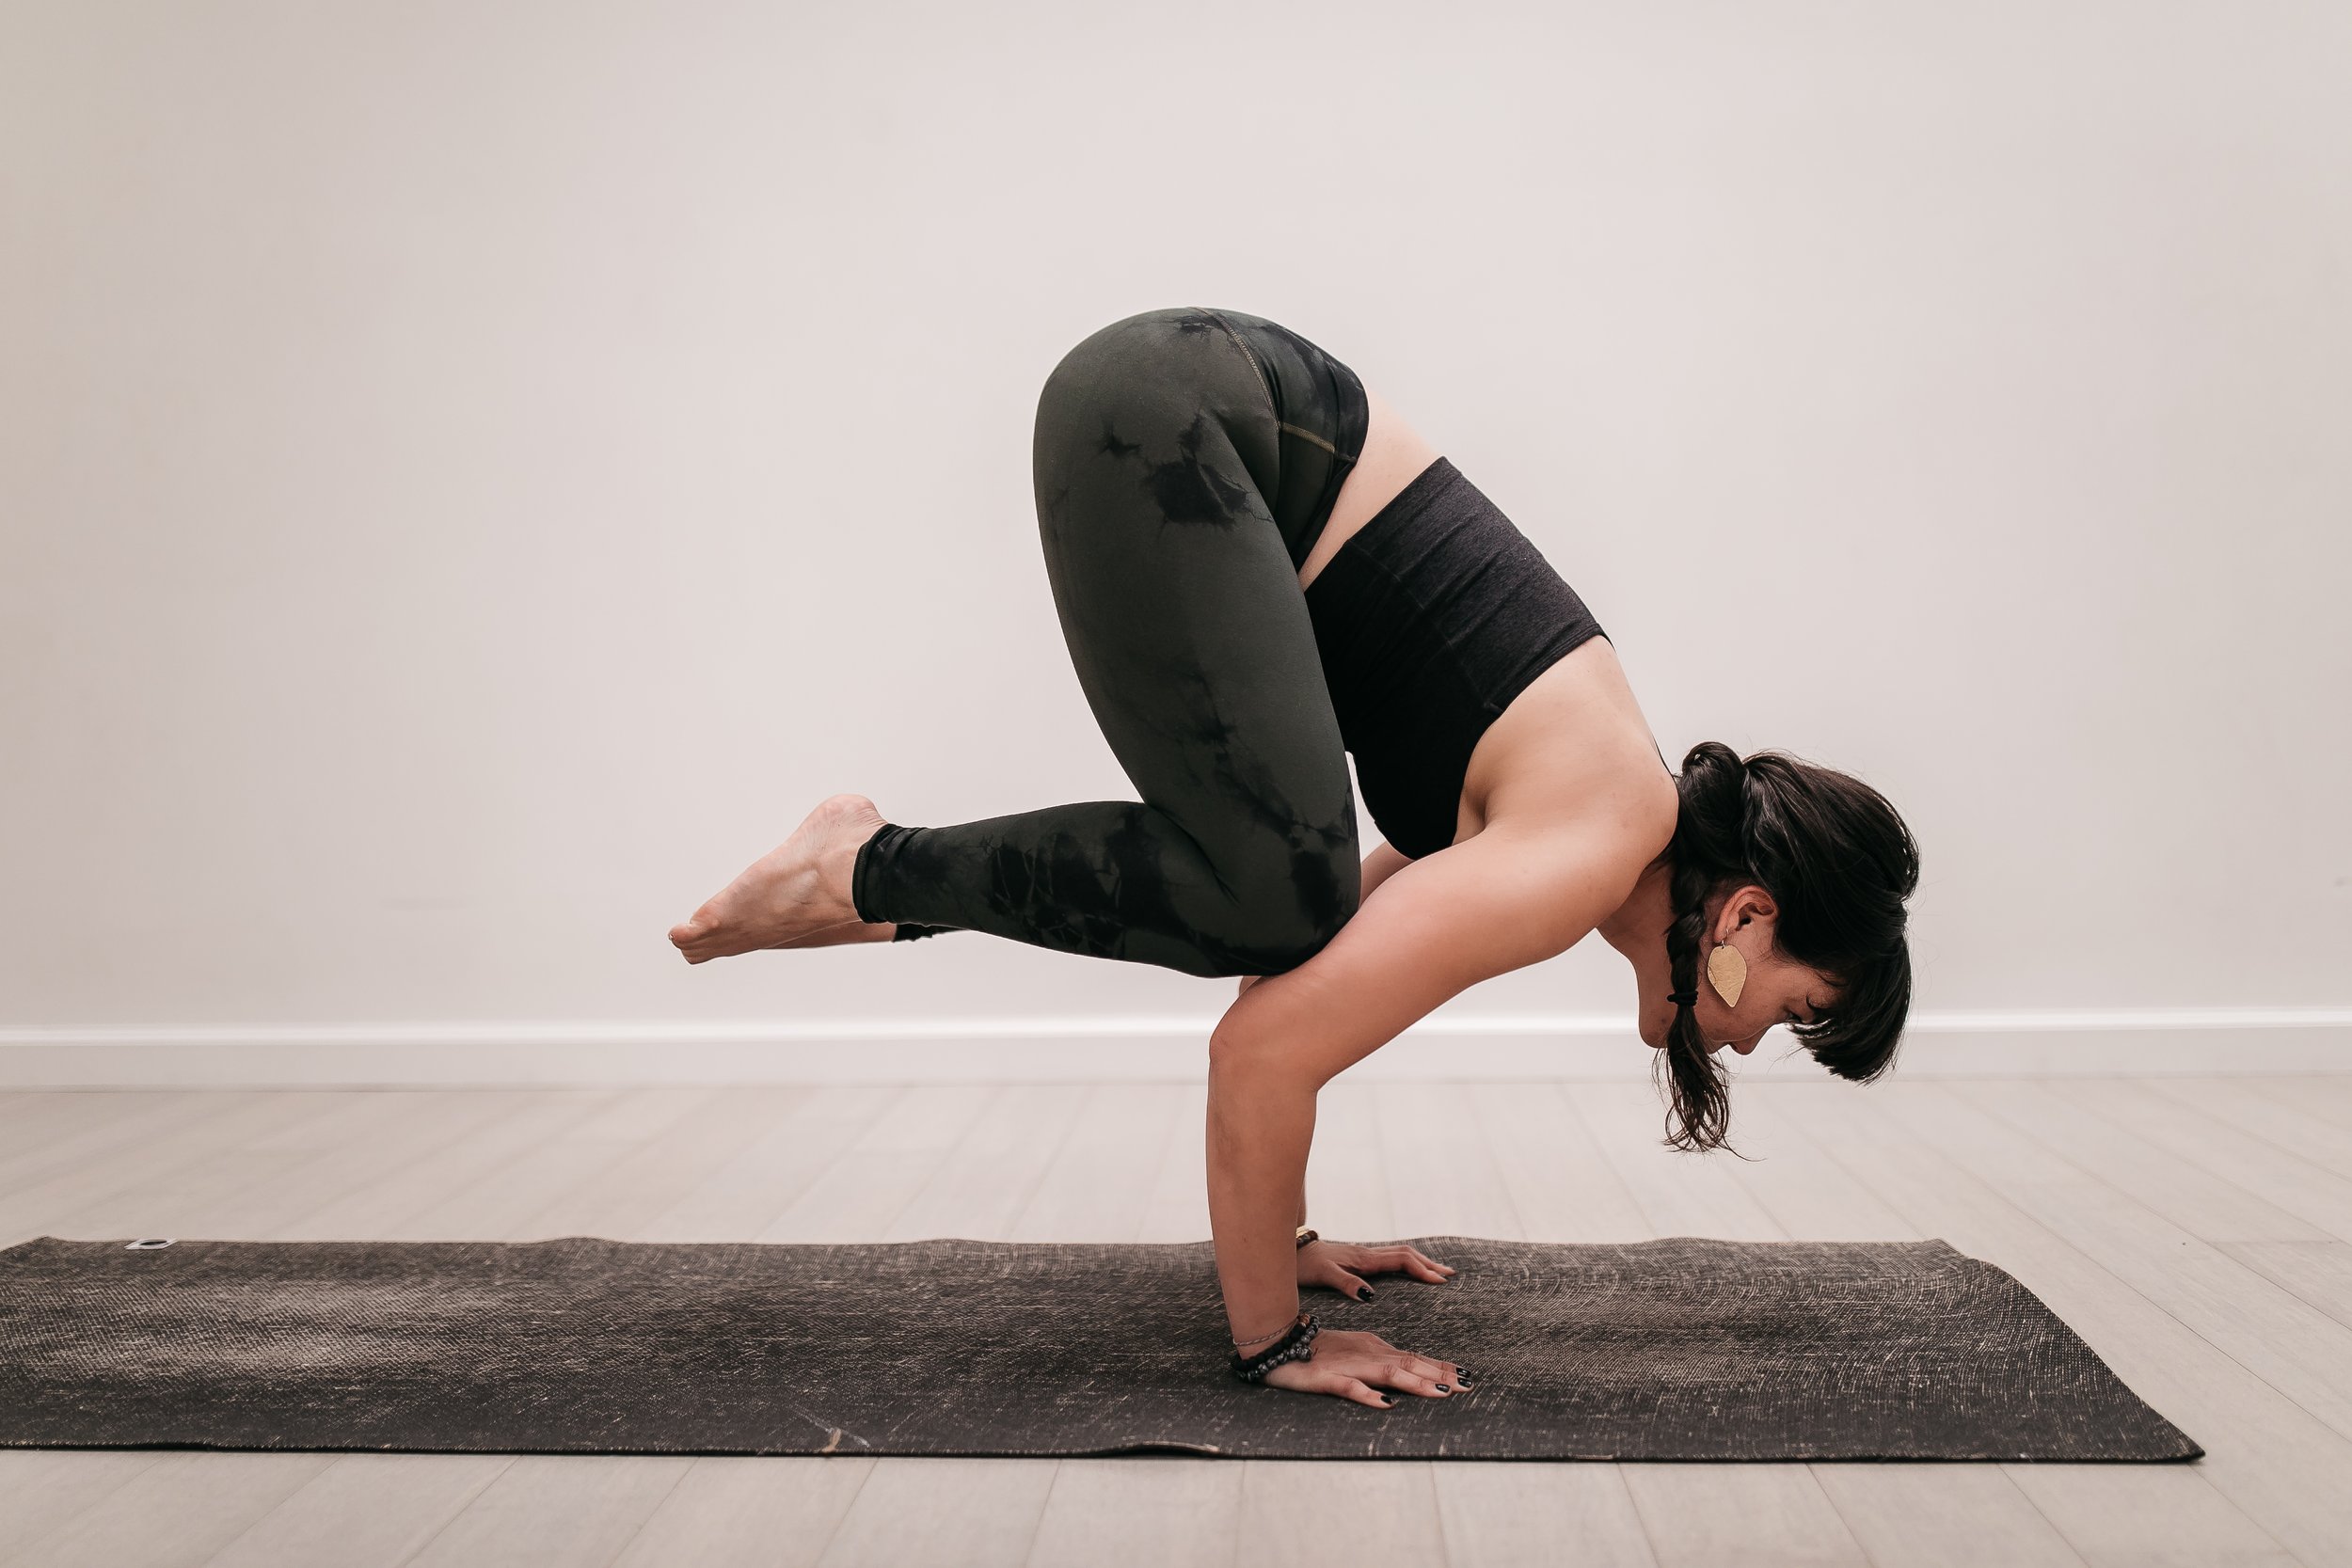
Now in honor of the looming holiday, our bird pose of the month, Bakasana. A baka is a heron or crane (we’ll use the latter name), and according to my Sanskrit-English dictionary, also a “hypocrite, cheat, rogue, the crane being regarded as a bird of great cunning and deceit.” The pose is quite challenging, most beginning cranes have a hard time taking flight. But once you get the hang of it, like all balancing poses, it’s tremendously exhilarating.

It would be useful before launch if you did a few simple groin openers: a bent-knee lunge, perhaps, Bound Angle (baddha konasana), wide leg sitting forward bend (upavishtha konasana) and its standing cousin (prasarita padottanasana), and the squat known as the Rosary (malasana). You might also do a rounded back exercise, like the Ball Pose (kandukasana), in which you lie on your back, hug your thighs to your torso, and lift your nose to your knees, firming your belly. That done, ready?

1. Squat down, feet slightly apart and inner feet parallel, heels elevated on a thickly folded blanket or sand bag if they don’t rest easily on the floor. If this is your first attempt at this pose, or have crash landed with previous attempts, put a block on the floor maybe a foot or 18 inches in front of you, either on one of its ends (so it’s at its tallest height) or one of its sides (at middle height). You’ll get a better sense where to position the block and at what height as you move toward the pose. We’ll call this variation Tofu Crane so our vegetarians don’t feel left out.

2. Work your torso down onto your inner thighs and your shins into your armpits. THIS NEXT IS CRUCIAL. You must have your hands as wide as the narrow width of your sticky mat and your elbows stuck sharply out to the sides, wider than your shins.

3. Lean forward and rest your head on the block. If it feels too high, back off and lower it, too low the same and raise it. Now lift your buttocks away from your heels. Yes, I know, you Iyengar people relax, we’ll get to the buttocks and the heels shortly. Be sure you round your back as you did in Ball Pose, belly contracted, very wide between the shoulder blades, tail bone releasing down.

4. Once in this position, hold for 20-30 seconds or as long as you can comfortably. Then release your buttocks back to your heels and consider yourself an honorary Crane. Stretch your arms out to the sides and flap them like wings, but resist the temptation to wade into the Bay hunting for fish. However, if you do feel confident that you can go to the next level, return to the previous position, and this time pick your feet slightly off the floor, drawing your heels toward your sitting bones. Again hold 20-30 seconds, or as long as you can comfortably, and release your feet to the floor. Flap your wings again.

5. If you feel like you’ve reached your limit for the time being, see the suggestion at the end of this breakdown (or is it a “beak down”?). But if you feel you’re like you’re ready to leave the nest (figuratively speaking, of course) and soar into the firmament, remove the block and squat down. To be on the safe side, you might want to position a bolster or thickly folded blanket in front, just to use to pad your face and nose if things don’t work out as we’re both hoping they will, you probably more than me.

6. Now lean forward again, head neutral (that is, looking down at the floor), and do what you did in step 4 above, lift your buttocks first, then your feet as high as you can. Round your back, firm your belly, hold 20-30 seconds or however long you can comfortably, then release. Flap.

7. Now for what is considered the full pose among Nest Iyengar veterans (and I’m talking decades here), like our own Mary Paffard (she’s back 20 November), Leslie Howard, and treasured friend Patricia Sullivan. This time when you come up, DON’T lift your buttocks away from your heels, lift the buttocks and heels as a unit. Since you’re copying an Iyengar student, imagine a teacher hollering at you to “Tuck up those heels.” And hey, no cheating! Then press your inner legs against the outer arms and straighten your elbows. Hold for 30 seconds to a minute, and release. If you come down before that time, but you’re feeling good that you got as far as you did, the imaginary teacher will scold, “Nobody told you to come down.” Needless to say, if you want to flap, be sure your arms are equi-distant from the floor with the elbows fully extended. And don’t forget, today’s maximum is tomorrow’s minimum. 

You might want to do a reclining twist either with knees bent or legs straight to release your back (jatharaparivartanasana). Happy Thanksgiving (I’m especially grateful for my models, Alice, Lynn, Katherine, and Kirsten).

Equal Ratio Breathing by Richard Rosen

Equal Ratio Breathing by Richard Rosen

Sama vritti pranayama 

sama = same, equal

vritti = literally, course of action

There’s been quite a bit of information online and in health magazines lately about even ratio breathing, that is, breathing in such a way as to equalize the inhales and exhales. It’s typically offered as a means of calming the mind and overcoming stress. Oftentimes the presenters breathlessly proclaim the many health benefits of this type of breathing, both physical and psychological, making it seem as if this technique was just discovered yesterday. You can search for “box” or “square”  breathing” on YouTube if you want an example. But of course ratio breathing goes back hundreds of years in India. 

Shutting out all external contacts ... making the in-breath and out-breath move evenly in the nose, the sage whose senses, mind, and wisdom-faculty (buddhi) are controlled, who is intent on liberation and ever devoid of longing, fear, and anger–she is truly liberated (Bhagavad Gita 5.27-28). 

Please read through the instructions and the tips carefully. If you have any questions or concerns, you can contact me through Nest Yoga. 

1. You have three choices for your position when doing this breathing.

a. Sit on a chair. Be sure to sit on the front edge of the seat, away from the chair back, though if you like you can insert a bolster between your back and the chair back to support your torso. Sit then with a long front torso lifted through the top of the sternum. Have your thighs parallel to each other and your knees over your heels, so your knees are more or less at a right angle (you can bind your thighs parallel with a yoga strap if you like). Rest your hands on your thighs or stack them, palms up, in your lap. 

b. Sit on the floor. Be sure to sit on some kind of support, such as a thickly folded blanket so that your pelvis is neutral and not tipped backward, with a long front torso lifted through the top of the sternum. If you need help sitting, you can sit against a bolster between your back and a wall. Cross your shins in front of your pelvis (as in Easy Pose, sukhasana), alternating the cross day by day (right leg forward on even numbered days, left on odd), and support your thighs on blocks if they don’t rest easily on your feet. You could also sit in the Courageous Person Pose (virasana), supporting your buttocks on a block if they don’t rest easily on the floor between your feet. Rest your hands on your thighs or stack them in your lap, palms up. 

c. Reclining. If you’re just starting a breathing practice, this is probably the best position to assume until you feel comfortable with the exercise. Make yourself a blanket support. Ideally it should be about three feet long and maybe four to six inches wide, and three to four inches thick. Sit on the floor just in front of one end of the blanket and lie back along its length so your spine and head are supported. You can also support the back of your head and neck on a second blanket if you like. Lay your hands off to your sides, arms about 45 degrees angled to the torso, palms up. You could also support your knees on a bolster. 

2. Close your eyes and “step back” from yourself, make any small adjustments in your alignment that may be needed. Spend about a minute or so simply being aware of yourself without judgement or expectation. Then bring your breath into the foreground of your awareness, again without judgement or expectation, just watch your breath as it comes and goes. Spend a minute or two “just watching,” notice as you do that your breath spontaneously slows down. Get a sense of the length of your exhales.

3. Then purposely begin to slow your exhales even more. Notice the slight pause at the end of each exhale, then purposely begin to “drag” these out; that is to say, linger in the pause for as long as you like. Remember, this isn’t a breath holding, it’s rather a pause, during which time you can again monitor your alignment and enjoy the stillness in the pause. If you wait long enough, say 12 to 15 seconds, you’ll feel the urge for the next inhale building inside yourself. Wait until it feels ready, and let the breath in without “grabbing” at the air, simply receive it with a minimum of effort. Then slowly exhale and repeat the process again. Do this for a minute or two. 

4. Now you’re ready to begin the equal ratio breathing. Exhale, pause, and with your next inhale, receive the breath and slowly count: 1 - 2 - 3 - 4 - 5, stop and immediately exhale, 1 - 2 - 3 - 4 - 5, and pause and wait. You should co-ordinate the movement of your breathing with the count, finishing both the inhale and exhale with 5. If 5 is too much, then step back to 4. Continue on for three minutes at first, over time gradually extend your practice time to five to eight minutes. When done, return to everyday breathing for one to two minutes, once again closely following your breath but not interfering with it at all. 

5. Finally to properly end the practice, lie on the floor in shavasana for two to three minutes, be sure to leave some time at the end of your practice for this, please don’t skip shavasana (if you’re lying on a support, shift gently to one side and remove it from under your back). When you’re done, roll to one side, head on the floor, wait 20-30 seconds, make your head heavy, and push your torso up, head trailing. Practice time will be between 10 and 16 minutes. 

TIPS

1. To get the maximum benefit from this practice, try to be as regular as possible, at least 4-5 times each week, 5-6 would of course be even better. Don’t expect miracles at first, in fact don’t expect much of anything for awhile. Remember the 3 P’s for success: Practice, Persistence, and Patience.

2. If you get tired before the allotted time has elapsed, DON’T force yourself to continue. STOP immediately and lie down in shavasana. The same goes for any negative feelings that may arise, like frustration or irritability. STOP. Never push yourself in breathing. It’s not unusual to have an off day now and again, I still do after nearly 40 years of practice. But if the discomfort persists for more than a few days, either contact me through Nest or talk to your teacher about the situation.

3. If you have some extra time, you might spend a couple of minutes in a passive chest opener, such as lying over a block or a rolled up blanket, before you begin breathing

Richard Rosen's Asana Breakdown: Scissor Pose

SCISSOR POSE

Modified Parshvottanasana

parshva = side

uttana = intense stretch (NOTE: in Sanskrit, when a “u” begins a word that follows a word that ends in “a,” like this, parshva uttana, the two words are joined and the letters blend to an “o,” like this, parshvottana)

1. Stand on the front left corner of a short end of your mat so the length of your mat is behind you. Swing the right foot to stand to the outside of the left so the legs are crossed, or we could say “scissored.” Exhale and lengthen the torso forward into a standing forward bend. If you can’t easily touch your hands to the floor, rest them each on a block. 

2. Look back along the length of your mat at the right edge. Inhale, step your left foot back about a yard to that edge, so that now the right foot is on the left front corner and the left foot on the right edge. Straighten both knees and bring the inner feet parallel to the long edges of the mat.

3. Check the position of your right hip. Typically, if you’re tighter in the hips, the right hip shifts off to the right and up toward the right shoulder, which shortens the right side of the torso. If needed then, hook your right thumb in the hip crease and push in and back, lengthening the right side of the torso. Sometimes when you do this the weight shifts to the outside of the right foot. If needed, as you continue to release the hip, use your left thumb to firmly press on the base of the right big toe–not the toe itself, remember, but on the toe’s mound on the ball of the foot. 

4. While pressing the right big toe mound firmly to the floor, think of doing two things: 1) draw imaginatively up along the inner leg from the ankle to the inner right groin, softening that groin more deeply into the pelvis; and 2) from the base of the toe, again draw up in your imagination, this time diagonally across the leg to the outer hip. Imagine the legs are pressing toward the back of the mat as the torso lengthens forward. 

5. From the release of the inner groin and outer hip, lift the torso slightly up and forward on an inhale and from deep inside the pelvis, draw the belly out, creating as much space as possible between the pubic bone and navel. Then exhale and lower your torso down again, maintaining the length in the lower belly. 

6. You can continue to perform the pose as a forward bend, but if you want to create more a bit more stretch in the outer hip, rotate your torso to the right. Keep the left hand on the floor inside the right foot, and bring the right hand up onto the hip. Let the left hip drop slightly toward the floor, and soften the inner right groin to receive the twist. Make sure you don’t lean to the right, keep your torso more or less perpendicular to your legs. Remember that as with all twists, the rotation is rooted in the groins, not in the lower back and belly. You might spread your right palm against your sacrum and press back through your tail bone to maintain the length of your lower back.

7. Hold for 30 seconds to a minute, release the twist with an exhale, and with an inhale lift the long front torso up by drawing down on the tail bone. Be sure not to finish by stepping forward onto the right foot. Turn the feet parallel to each other and step or hop the feet together. Reverse to the left side for the same length of time.

Richard Rosen's Asana Breakdown: VIRASANA

VIRASANA

vira = literally, “man,” especially a brave or eminent man, hero, chief; cognate with English words like “virtue, virile.”

You may not be able to sit all the way down to the floor, at least at first, so have a yoga block within reach, just in case it’s needed.

BENEFITS:

According to Yoga Journal, Virasana increases flexibility in the knees and hips, tones the muscles in the arches of the feet and increases circulation in the feet and legs. https://www.yogajournal.com/poses/master-hero-pose-virasana-5-steps/

PRACTICE:

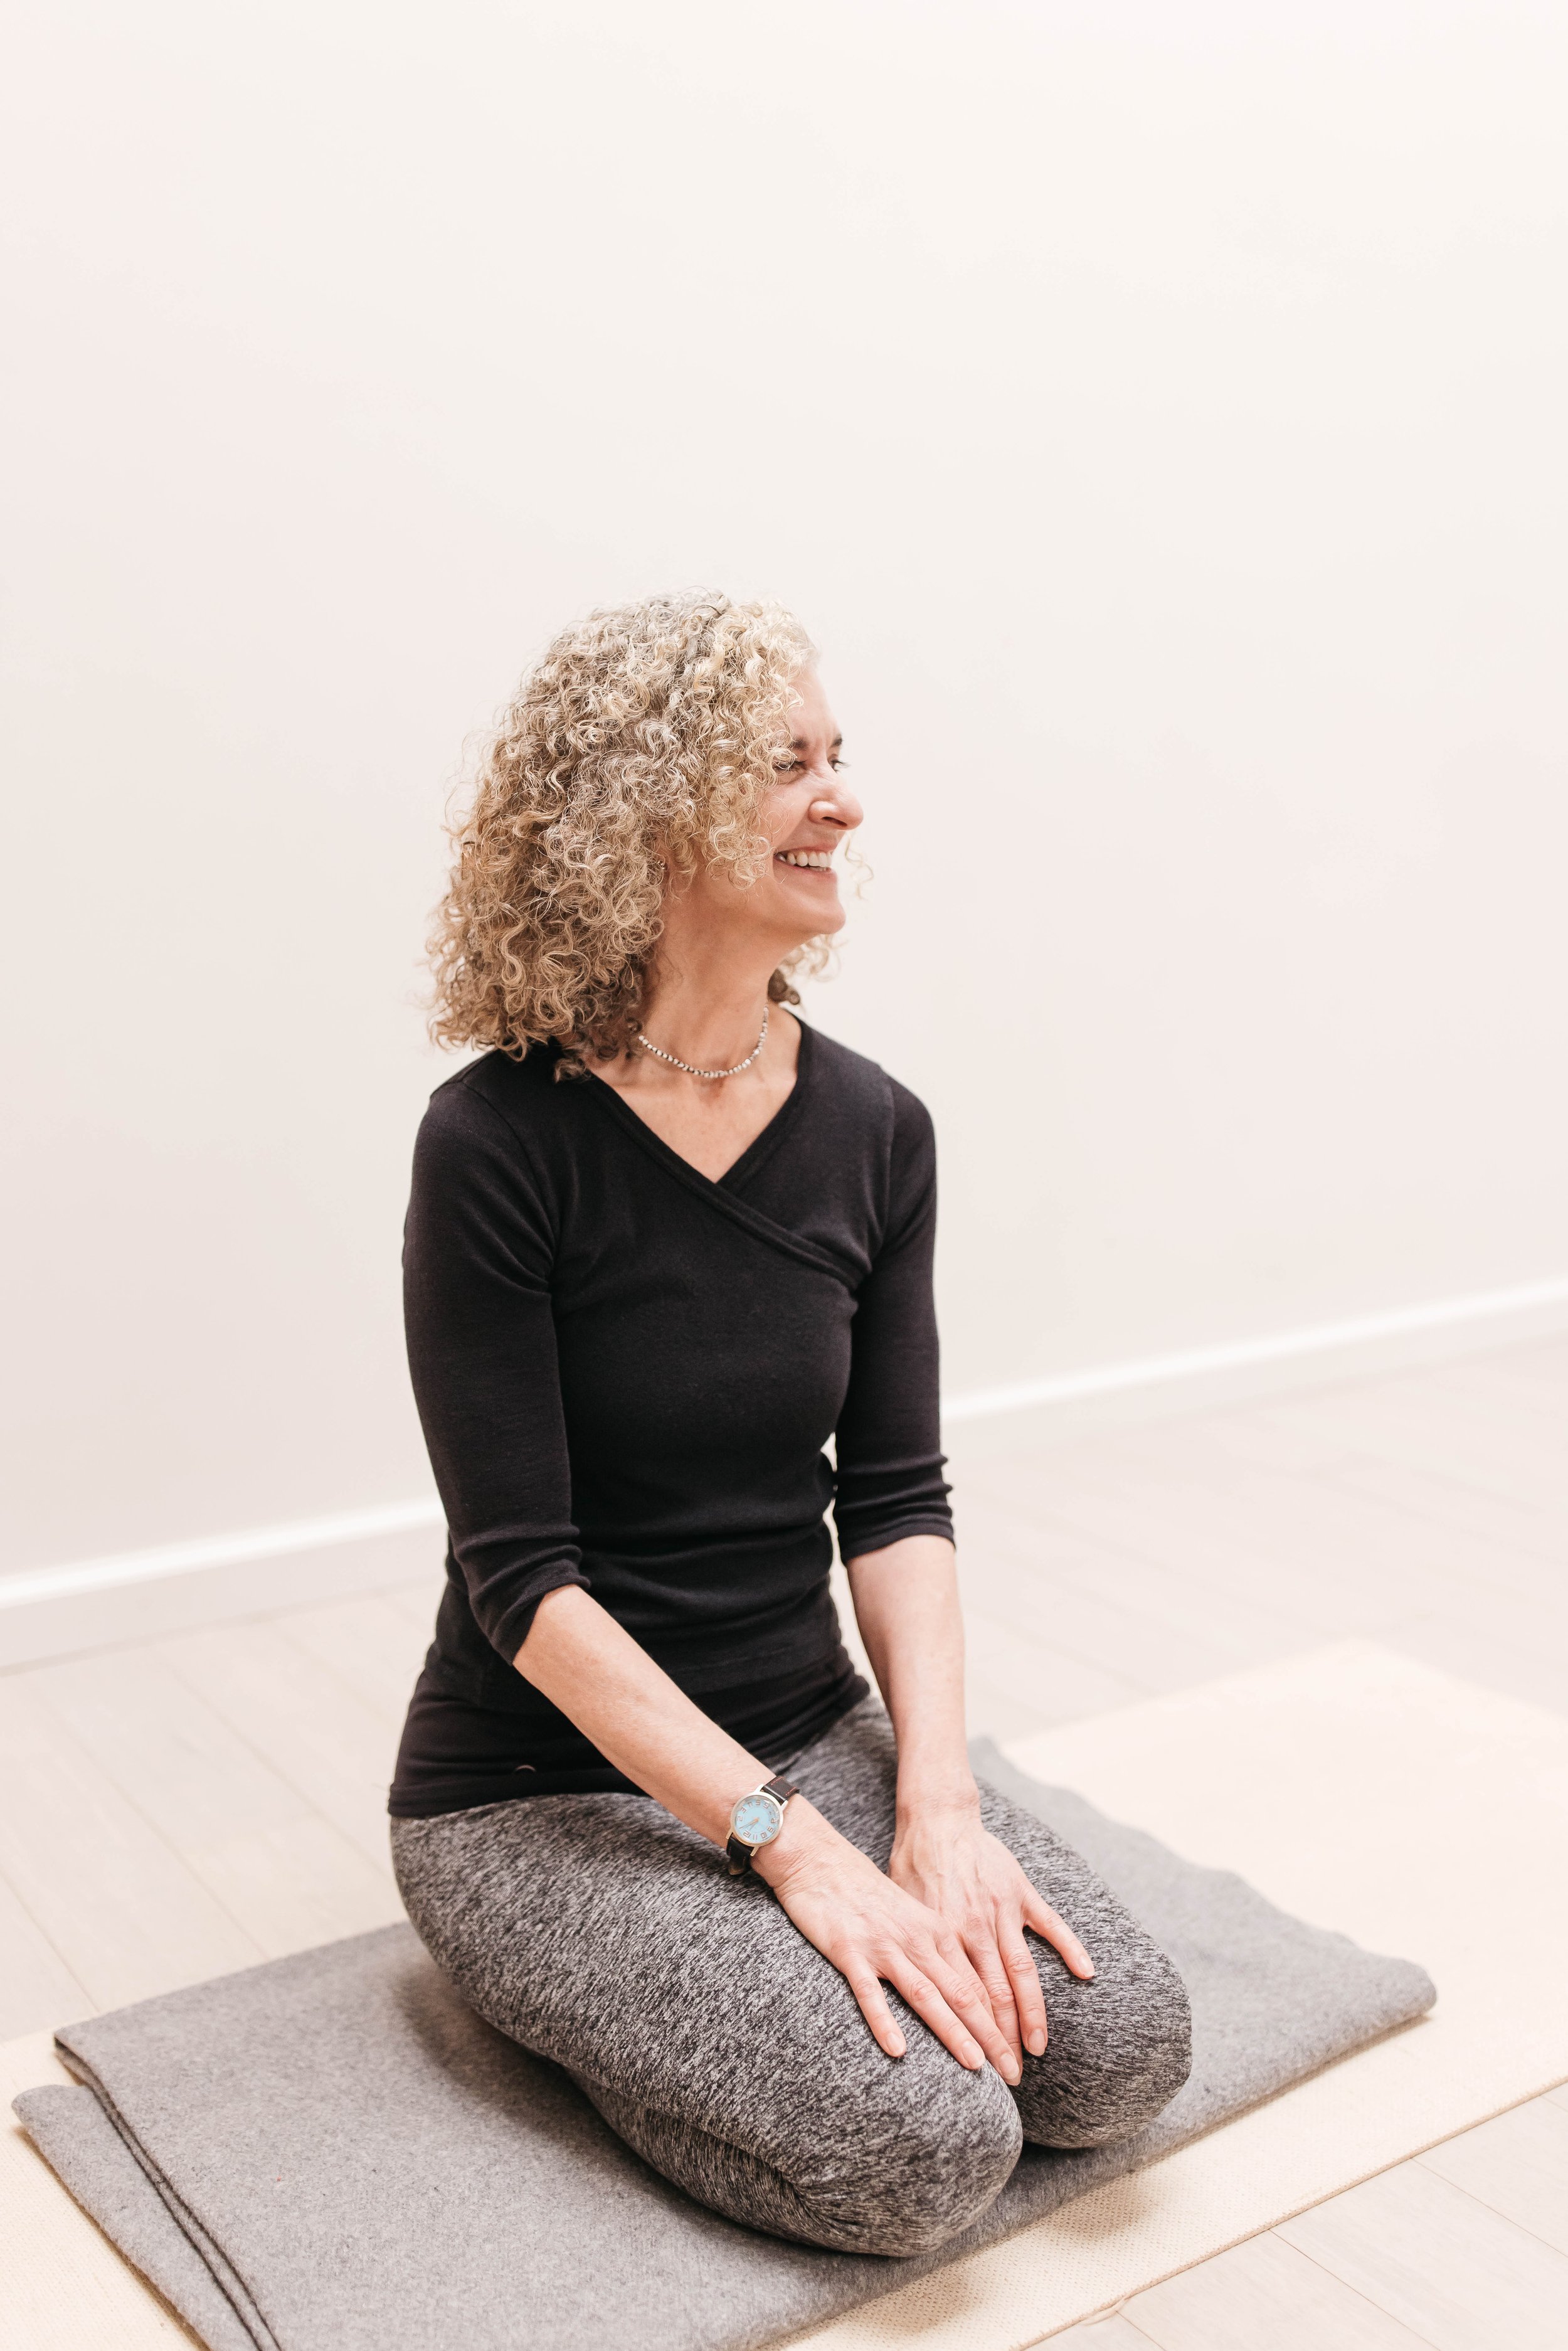
1. To begin, kneel on the floor with your thighs and torso upright. Separate your feet slightly wider than hip width.

2. Press your fingertips into the backs of the knees, and draw the calves toward your heels. You might have seen students moving into the pose by turning the calves laterally, that is, from the inner leg to the outer. This isn’t recommended here.

3. Once your calves are drawn away from the backs of the knees, slowly sit back. As mentioned, it may not be possible to sit all the way down on the floor. In this case, position the block between your feet, be sure to sit across the block so that both sit bones are equally supported. You can place the block at it lowest height, on one of its faces, or if needed, at its middle height, on one of its sides. If needed, use a second block to sit even higher.

4. Your inner heels should be slightly away from the outer hips. You should ideally be able to slip your thumb between the heel and the hip. Also see that your toes are turned slightly in, so that the swell of the hip matches the curve of the foot’s inner arch.

5. Use your yoga x-ray vision to gaze through the flesh of your thighs to the thigh bones (femur) underneath. Your femurs should be more or less parallel. Since the female pelvis is slightly wider than the male, a woman’s inner thighs may be slightly apart.

6. With your right hand, hold your right knee and lift it a few inches off the floor, stretching the front ankle. With the knee slightly elevated, allow the head of the to “drop” toward the floor. Imagine the bone is like a see-saw, so that when the knee end is lifted, the hip end descends. Then carefully lower your knee back to the floor, and repeat on the left.

7. Slide your hands under your sit bones and pull them back and apart. Then press the bases of your hands into the hip creases, right where the thighs join the pelvis. As you push firmly down on your femurs, lift your front torso through the top of the sternum. Then press the bases of your hands against the outer edges of your feet, widening the tops of your feet on the floor.

8. Finally, lay your hands on your thighs, palms down, or cup your hands around your knees and pull, using that to lift the top sternum.

VARIATION

Curl your fingers under your toes, palms rest on the soles. With an exhale, lay your torso down on your thighs, head on the floor. Try to keep your buttocks as close to the floor/support as possible. If your head doesn’t easily rest on the floor, support your forehead on a block.

COMING OUT OF THE POSE

To protect your knees, it’s essential to come out of the pose properly. There are three ways to do this.

1. Lean to the left and hold your right ankle. Pick your right leg up, and keeping the knee completely flexed, stand your foot on the floor. Drop your knee off to the right, extend your leg out to the side, then swing your leg in front of your torso. This assures that there’s no rotary movement in the knee, which is a hinge joint. Repeat on the left.

2. Press your hands to the floor and lift your buttocks up off the floor/support. Cross your ankles under your buttocks, lean back slightly, and stretch your legs straight forward into Dandasana (Staff Pose).

3. Press your hands to the floor and with an inhale, step back into Adho Mukha Svanasana (Downward Facing Dog).

TIPS

1. If you feel tightness in your knees, try this. Take a yoga belt and fold it in half. From position (1) above, lean forward and rest your crown on the floor. Wedge the belt tightly into the backs of your knees, then lift your torso up and sit back. The belt should ideally create some extra space in your knees.

2. If your ankles complain, roll up a towel and place it under your ankles. Over time, as your ankles release, make the roll smalller and smaller until it’s no longer needed.

3. Have some extra National Geographics around? In the old days, we would place a stack below our buttocks, using just enough issues to sit relatively comfortably. Over time, as the thighs released and we could sit more easily on the stack, we’d remove one of the magazines and so sit a bit lower. This we’d repeat each time we felt our thighs releasing, and so gradually we worked our way down to the floor.

4. Want to really ground the femurs? Buy a 25-pound barbell weight and lay the edge into your front groins. The flat surface of the weight should then rest against your belly. You can secure it in place by looping a belt around your torso and the weight.