Women's Month ~ March 2022

In honor of Women’s Month, we asked our amazing Yogini Teachers to share about the women that most inspired them!

Leslie Howard teaches Hatha Yoga Tuesdays 9AM:

My vote is with Alexandria Ocasio-Cortez/AOC. Her poise and ability to respond to constant hatred and threats is inspiring. She is a true yogi. When she was called a f....ing bitch by a Republican congressman, her reply: "This issue is not about one incident. It is cultural. It is a culture of lack of impunity, of accepting of violence and violent language against women and an entire structure of power that supports that," she said. She refutes Yoho’s veiled claim that because he has a wife and two daughters that he could not be sexist. She says, “I believe that having a daughter does not make a man decent. Having a wife does not make a decent man. Treating people with dignity and respect makes a decent man. And when a decent man messes up, as we’re all bound to do, he tries his best and does apologize.”

About a woman's right to choose: “Ultimately, this is about women’s power. When women are in control of their sexuality, it threatens a core element underpinning right-wing ideology: patriarchy. It’s a brutal form of oppression to seize control of the 1 essential thing a person should command: their own body.”

Margi Young teaches Yoga & Meditation Monday & Wednesdays at 10AM, and Hatha Flow Fridays 12PM:

At first some of the greats popped into my mind such as Michelle Obama, Audre Lorde, RBG, Melinda Gates & Kamala Harris. But who really inspires me EVERY DAY is my mom. She is 85 years old and may as well be a rock star! She plays tennis, fights for social justice by working for The SF Achievers (an organization that supports black men through college scholarships, leadership training and mentoring), she knows every art exhibit happening, and is on an eternal quest for knowledge. Thanks mom for sharing your endless gifts and continuing to take care of me!

Reba Gray teaches Vinyasa Flow Sunday 4:30PM & Friday 5PM, and Flow & Restore Mondays 12PM:

I am inspired by my cousin Dawn, who has always felt like a sister to me. I am amazed by her artistic mind- she can make just about anything. She also is skilled in caring for animals and has a ton of compassion for all living beings.

Lynn Ursic teaches Hatha Yoga Wednesday 5PM & Thursday 9AM:

Lucky me to have my aunt, Vaunda Carter. Born of immigrants-graduated Mills College in 1960 with a degree in modern dance, then toured the world with several major companies.

In the mid 60’s she founded the Portland State University modern dance department- “I became a master teacher because I saw so much potential in bodies”. She also wrote and hosted a tv show for nine years to give women at home an opportunity to connect with physical expression and health.

A few of my favorite quotes from Aunt Vaunda:

“Start fresh at any moment- what is beautiful about you right now?”

“The body is the conduit between the inner realm of Intentions, ideas, emotions and identity - and the outer realm of expression. We shift back and forth between the inner/outer sense of body.”

“The practice comes alive as you learn to step out of your thoughts and connect with your body’s experience.”

Sarah Moody teaches Restorative Yoga Thursday 7:15PM:

I’m most inspired by my grandmother. She is 94 and does Pilates and crossword puzzles every day. I'm crossing my fingers I get her genes!

Brynn McNally teaches Gentle Flow Monday 8:45AM and Flow & Restore Tuesday 7:15PM

“The more clearly we can focus our attention on the wonders and realities of the universe about us, the less taste we shall have for the destruction of our race”, said Rachel Carson. I'm inspired by Rachel’s discipline and courage in speaking truth to power through her environmental writing. She managed to complete Silent Spring while caring for her mother and two nieces, through a personal battle with cancer, and against the backdrop of harsh criticism and 1960s patriarchy. Whenever I'm feeling small or incapable, I think about her tenacity. Her scientific lyricism reminds us to dwell in our admiration of the natural world, and to remember how the Earth's health is vital to our own.

Richard Rosen's Asana Breakdown: Simhasana

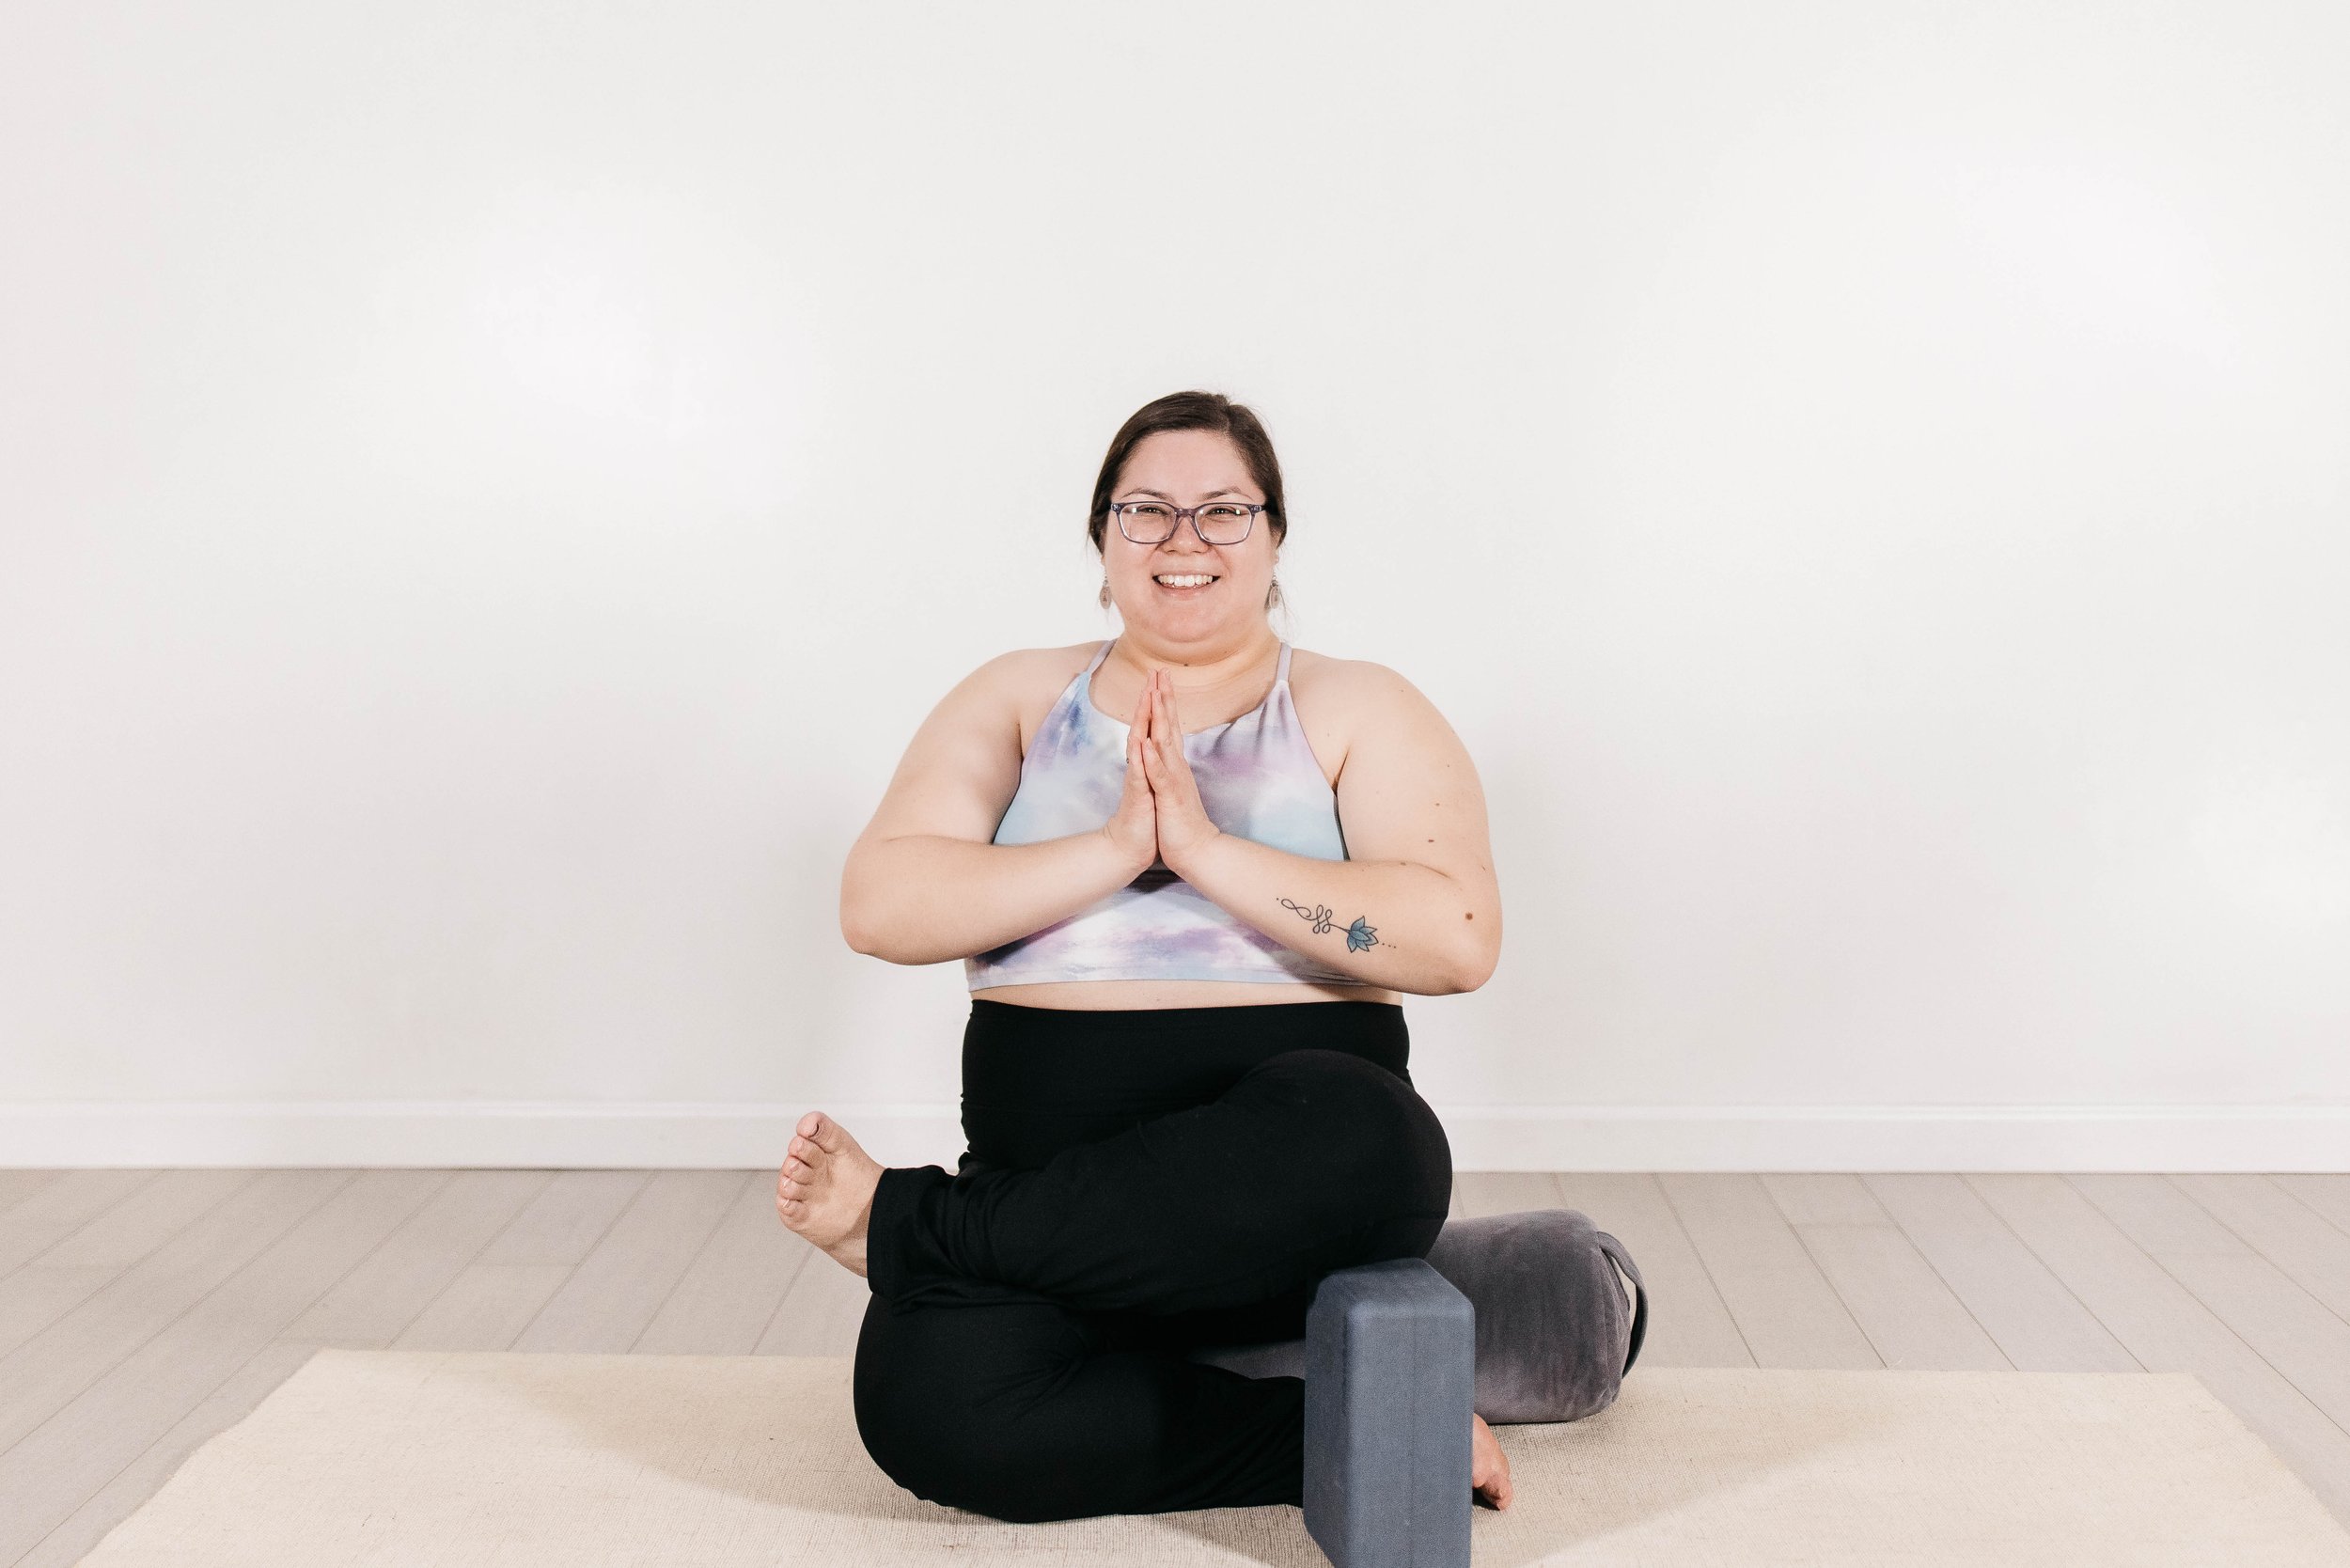
SIMHASANA (Lion Pose)

March comes in like a lion, out like a lamb.

–Oldest known reference in a book of proverbs by English author Thomas Fuller (1732)

Simha = Sanskrit, “a lion,” also identified with the Self (atman). 

Simhasana is a very old pose. We can trace it back at least 1300 years (the dating is highly controversial, so it could be older) to the Tiru-Mantiram (“Sacred Mantra”), composed in Tamil by Tirumular, a devotee of Shiva. About 800 years later, in the mid-fifteenth century, we find it in Hatha Yoga’s seminal text, Hatha Yoga Pradipika (HYP, “Light on Hatha Yoga”). The text’s compiler, Svatmarama, describes it this way:

Put the ankles below the pelvis on both sides of the perineum–left ankle to the right side, right ankle to the left. Press your hands on your knees, spread your fingers, open your mouth, and gaze steadily at the tip of your nose with your mind well-concentrated. This is Simhasana, honored by the best yogis (1.50-52).

Notice there’s no mention of the characteristic “roar” and the stretched out tongue we typically include in the pose’s performance, which suggests they’re a modern addition. 

Fifteen poses are included in the HYP, a very small number by today’s standards. But at the time it was quite a large number, earlier texts rarely presented more than four poses. Of the 15, Svatmarama distinguishes four as the “best” (shreshtha, 1.34), Adept’s Pose (siddhasana), Lotus (padmasana), Auspicious Pose (bhadrasana, today called baddha konasana), and Lion. Considering how infrequently we perform Lion in classes nowadays, it might seem odd that it was once thought of as being as important as Lotus, one of the most iconic of yoga asanas. Why was Lion so “honored”? Svatmarama explains that it “facilitates adopting the three bandhas” (1.52). These bandhas, you may know, are the essential “bonds”–or “valves” as I like to think of them–for the practice of pranayama, the throat bond (jalandhara), the perineum bond (mula), and the belly bond (uddiyana). This reminds us that, in traditional Hatha Yoga, the central practice was pranayama, unlike today when asana has taken on that role.

Sitting for Lion can be uncomfortable at first (or maybe uncomfortable, period). In the Iyengar asana canon, the position (which Svami Rajarishi Muni calls upavishasana, literally the “sitting pose,” p. 159) is used for only two poses Lion and the Dangling Pose (lolasana). Kneel down and cross your left ankle over the right, then sit with the perineum pressing against the left heel. We might wonder what benefit this rather unpleasant position has, and the short answer is: it creates a blockage at the base of the pelvis to “facilitate” mula bandha. The discussion of this and the other two bandhas is beyond the scope of this breakdown, maybe in future we can re-visit the subject. 

Anyway, if you find this position unbearable, then you might uncross your ankles, set the feet side by side, and sit again on the heels (called vajrasana, Diamond Pose), thighs parallel. If the fronts of your ankles against the floor protest, put a rolled up dish towel underneath them. 

Now reach out and press you palms against your knees, right palm right knee, left palm left knee, and spread your fingers wide, like the claws of a Lion. The widening and pressure of the hands has two benefits. One, the spreading of the palms has a sympathetic response in the shoulder blades, which widen across your back torso creating side to side space. According to Svami Kuvalayananda, this pressure helps cotrol the abdominal recti (lower belly muscles) to prepare for uddiyana bandha (p. 87). Two, the press of the hands against the knees helps to firm the shoulder blades against your back to support the lift of the sternum.

Now take a smooth, deep inhalation through your nose. What’s described next happens all at once. Open your mouth as wide as you can and reach the tip of your tongue down to your chin. Cross your eyes to gaze at the tip of the nose (nasa agra drishti), and with an emphatic HAAAAH, breathe out through your mouth. As you do this, be sure not to hunch forward, keep the front torso open by lifting straight up through the top of the sternum (manubrium). Having finished the exhale, release your eyes, take a few normal breaths and repeat two more times. Then lean forward, change the cross of your ankles, and repeat three times.

I should note that BKS Iyengar instructs the pose somewhat differently. He wants us to direct our gaze between the eyebrows (bhru madhya drishti), and to hold the open mouth for 30 seconds, breathing through the mouth. 

Mr Iyengar says Lion “cures foul breath and cleans the tongue” (p. 136). It will also, with regular practice, make your speech “clearer” (ibid), and as Svatmarama says, helps to create the three bandhas. Other sources tell us that Lion strengthens the diaphragm (Yogi Gupta, Yoga and Long Life, p. 60), increases circulation to the throat and tongue and stimulates the eyes (The Sivananda Companion to Yoga, p. 33). 

Lion can be used to begin either an asana or pranayama practice. 

Richard Rosen's Asana Breakdown: Half Lotus

ARDHA PADMASANA 

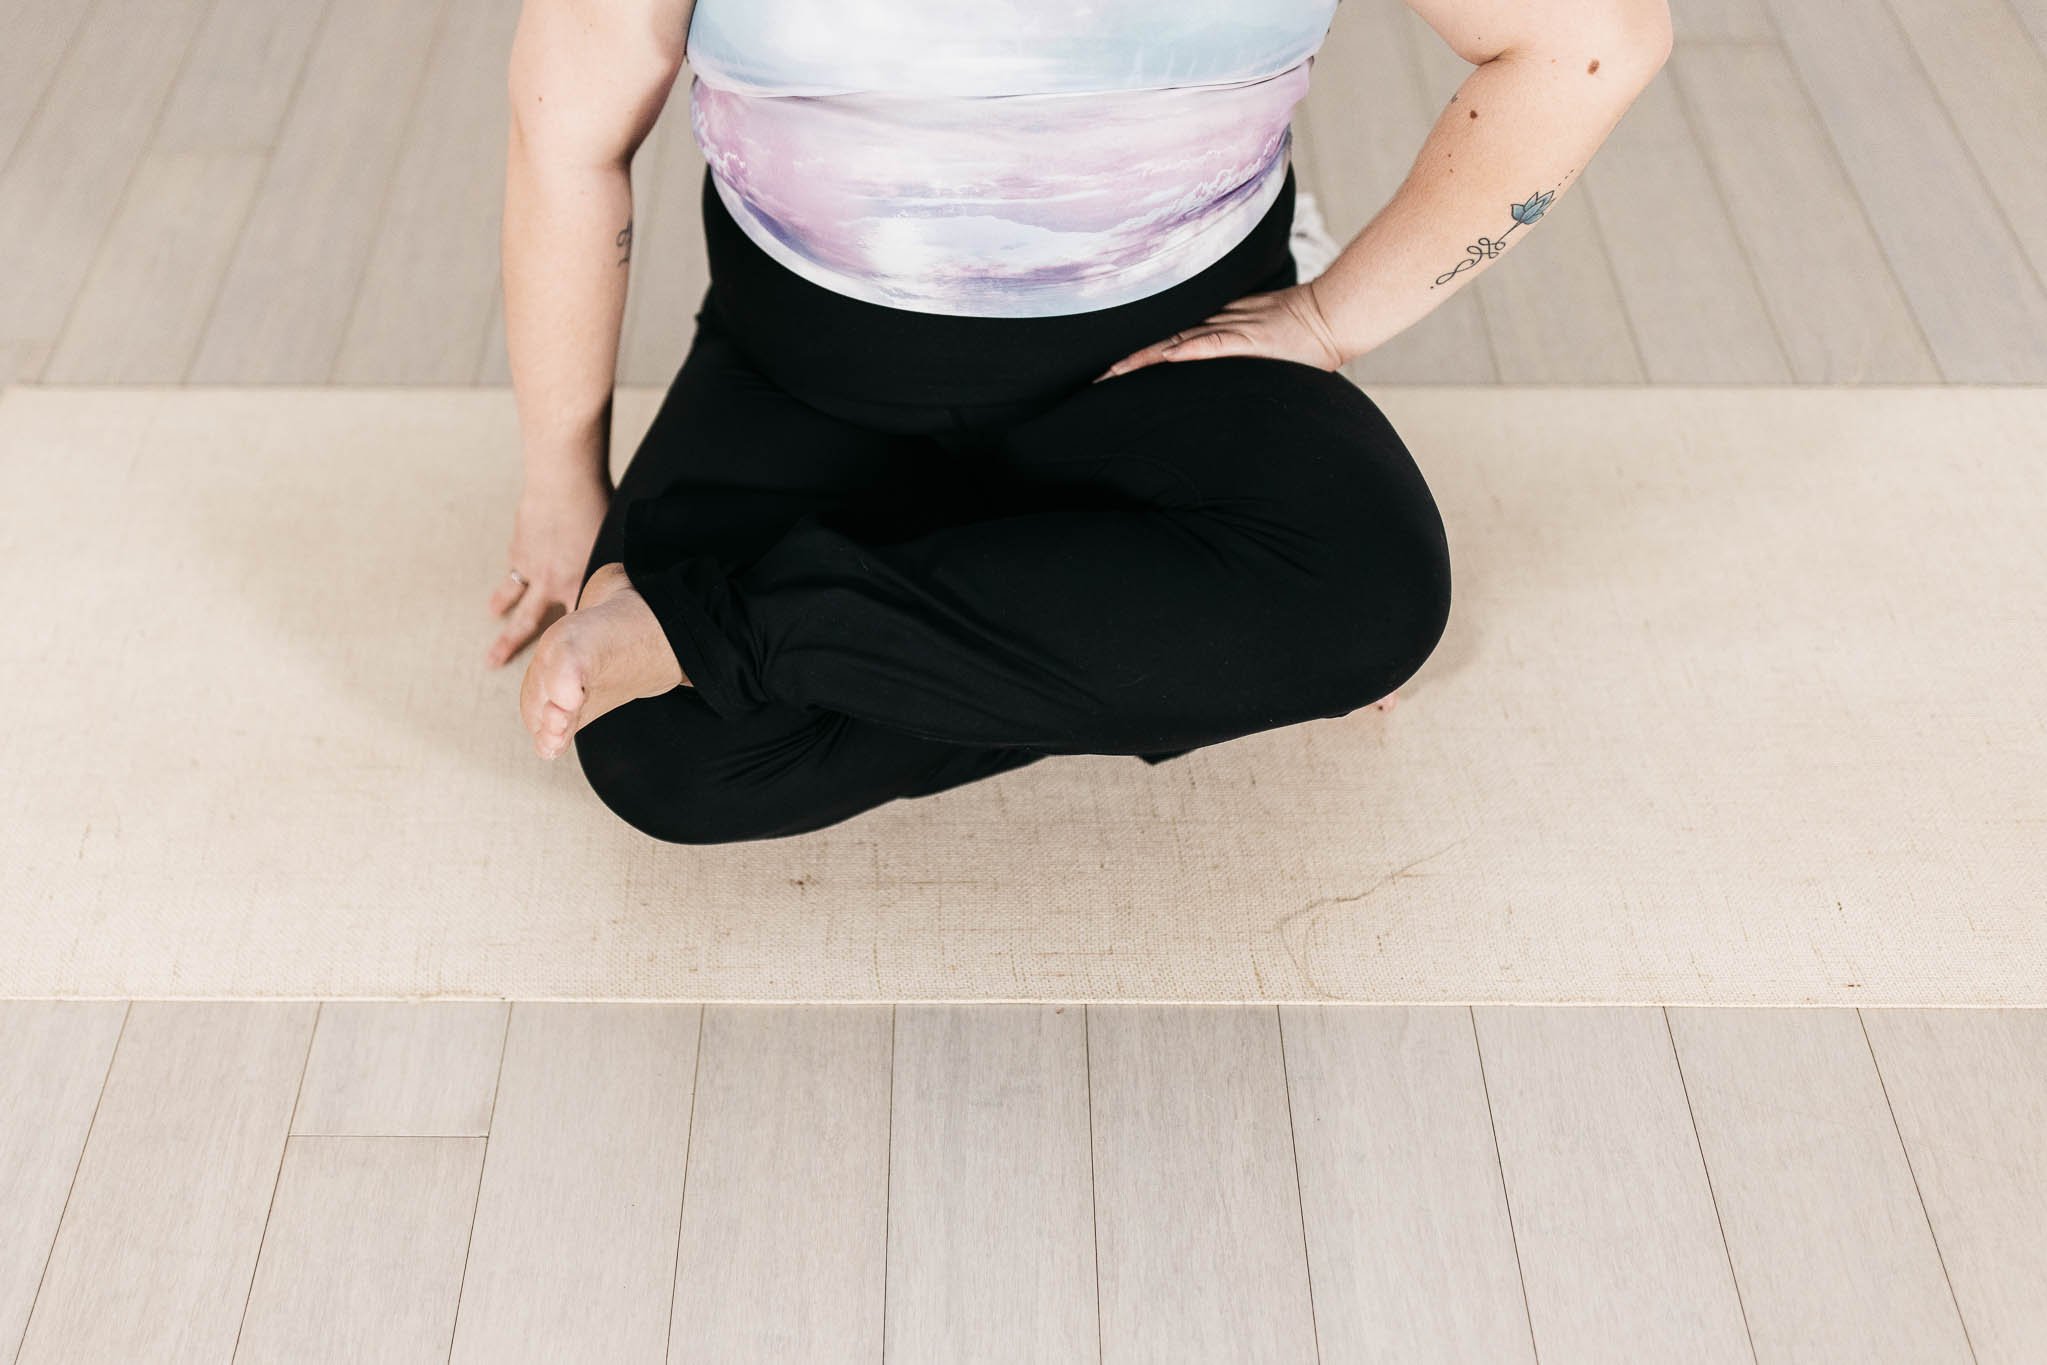
Half Lotus

Padmasana (Lotus Pose) is perhaps one of the most iconic of all the traditional yoga asanas. In the Hatha tradition it can be traced back more than 500 years, and no doubt it’s much older than that in the broader Yoga tradition. It’s typically considered one of the four “best” (shreshtha) poses, along with the Adept’s Pose (siddhasana), the Auspicious Pose (bhadrasana), known today as Bound Angle (baddha konasana), and, somewhat surprisingly, the Lion Pose (simhasana). 

The symbolism that attaches to the lotus is rich and varied. Hindu deities are often pictured seated on pedestals formed of stylized lotus petals, and the flower itself represents many gods and goddesses, including Vishnu, Surya (the Sun), Indra, and Kama (the Hindu Cupid). The lotus also symbolizes perfection and purity, the beauty of an ever regenerating creation, and the Sun. It’s also compared to the Cosmic Tree, which first emerged from the deity Varuna’s navel, with other deities hanging like fruit from its branches. This only scratches the surface of what the lotus means to Indian culture. 

The pose itself, be aware, is highly problematic, especially for Westerners, and I should say right at the beginning that if you have any issues with either or both of your knees, this is NOT a pose for you. I also want to be very clear that if you do attempt this pose–which here we’ll only be working on the half (ardha) version–to follow the instructions for getting into and out of it very carefully, DO NOT cut corners. 

If you’re just starting to learn the pose, it’s a good idea before attempting it to warm up the hips and groins. Poses might include Half (ardha) or full Hero Pose (virasana), Bound Angle Pose (baddha konasana), and a pose that I call Paper Clip Pose (a name provided by my incredibly intelligent daughter, who in this respect takes after her mother). Here’s how:

Sit on a height, maybe a thickly folded blanket or bolster (higher if you’re tighter in the hips). Bring your left heel to your right sitting bone and lay that leg on the floor. Then take your right ankle just to the outside the left knee and lay that leg down as well. It’s crucial that the ankle be just OUTSIDE the knee, so the right sole is perpendicular to the floor. Press your right thumb into the hip crease, take firm hold of the thigh bone, and spin it laterally, that is, from the inner thigh to the outer. You can then lean your torso forward, coming from the hips and not the lower belly, and press your hands on the floor in front of your shins. Alternatively, you can pull up a chair in front of your shins and rest your forearms or head on the seat (you may need a block under your forehead). Stay for at least two (excruciating) minutes, then reverse the legs and repeat for the same (excruciating) length of time. 

Now for Half Lotus. Continue to sit on your height, and again bring the left heel to the right sitting bone, laying that leg on the floor. As already stressed, follow these instructions closely. Bring your right thigh to your belly and squeeze the calf against the back thigh; in other words, completely flex the right knee. When bringing the right foot into place, there should be NO rotary movement in the knee (which is a hinge joint), it all happens in the rotary hip. Swivel the outer edge of the right foot into the left hip crease, bringing the knees as close together as you can. Once again, the sole of the top foot should be more or less perpendicular to the floor. If you’re new to the pose, hold for no longer than about 10 seconds, then bring the right thigh with the knee still fully flexed back to the front torso, then stretch the leg straight forward out on the floor. Repeat for the same length of time with the left leg up. 

One of my former teachers had a list of what he called “everyday poses,” which means just what it says: there are certain poses that need to be practiced regularly or not at all, among them Headstand (shirshasana) and Lotus. I would suggest 4 to 5 times a week. Gradually build the time you stay in the pose in 5 to 10 second weekly increments, staying very alert for any discomfort in one or both knees. Nest Yoga strongly advises that you ONLY attempt the full pose under the direct supervision of an experienced and trusted teacher. After finishing, lie on your back, secure the big toe of the right foot with the right index and middle fingers (or loop a strap around the sole), and stretch up through the heel (Reclining Big Toe Pose, supta padangushthasana). Actively contract the front thigh muscle (quadriceps), hold for a minute or so, and reverse with the left leg for the same length of time. 

There are various ways to place the hands. 

  • Lay the upturned hands in your lap, the back of one hand resting in the palm of the other.

  • Bring the palms together and rest the outer edges of your thumbs on your sternum. This is called anjali mudra. Spread the palms wide and press the palms evenly to each other. 

  • Cup the palms and bring one hand over the other, the bottom cup facing up, the top cup down, in front of your belly. This pose is called samputita pankajasana. A samputa is a hemispherical bowl, pankaja literally means “mud born,” another name for the lotus, which famously floats pristine on the surface of a pond, while its roots reach down into the mud on the pond’s floor. This hand position is called kacchapika mudra, the “tortoise seal.” 

  • Rest your hands on your thighs or knees, palms down. The latter is known as samasana, the Even (sama) Pose.

  • Cross your arms in front of your torso and hold your toes, right hand right toes, left hand left. This is called karmukhasana. Karmukha has many meanings, you choose: rainbow, bow, bamboo, a kind of honey, and efficacious.

  • The hands hold the same side feet, that is, right hand left foot, left hand right. This is called mukta padmasana, Free Lotus Pose. 

There are also a number of synonyms for padmasana (I’ve left off asana at the end of each):

  • amburuha: “water growing” (ambu, “water”)

  • ambuja: “water born”

  • abja: “born in water”

  • Goraksha kamala: “cowherd lotus” (Goraksha is a semi-legendary early progenitor of Hatha Yoga)

  • kamala: “lotus” (and Vice-president of the US)

  • saroruha: “lake-growing”

  • saroja: “lake born”


Old Iyengar hands would always marvel at the difficulty rating given padmasana in Light on Yoga. Each of the 198 poses in the book is given a number from 1, the easiest pose, like Tadasana, to 60, the most challenging, the next to next to last pose in the book, the impossible seeming tiriang mukhottanasana, a standing backbend in which the performer bends backwards and holds her ankles (not recommended). For most Westerners, who regularly sit on chairs, which plays havoc with hips and groins, we might expect Lotus to be somewhere in the high 20s to low 30s. But for the traditional Indian, who sits mostly on the floor, padmasana is the proverbial piece of cake, and so is rated, for us, at a completely unreasonable 4; for comparison, Triangle Pose (trikonasana) is a 3. Speculation was that since the book first appeared in 1966, Mr Iyengar wasn’t yet familiar with some of his Western students more severe limitations caused by chair sitting. 


Richard Rosen's Asana Breakdown: Hanumanasana

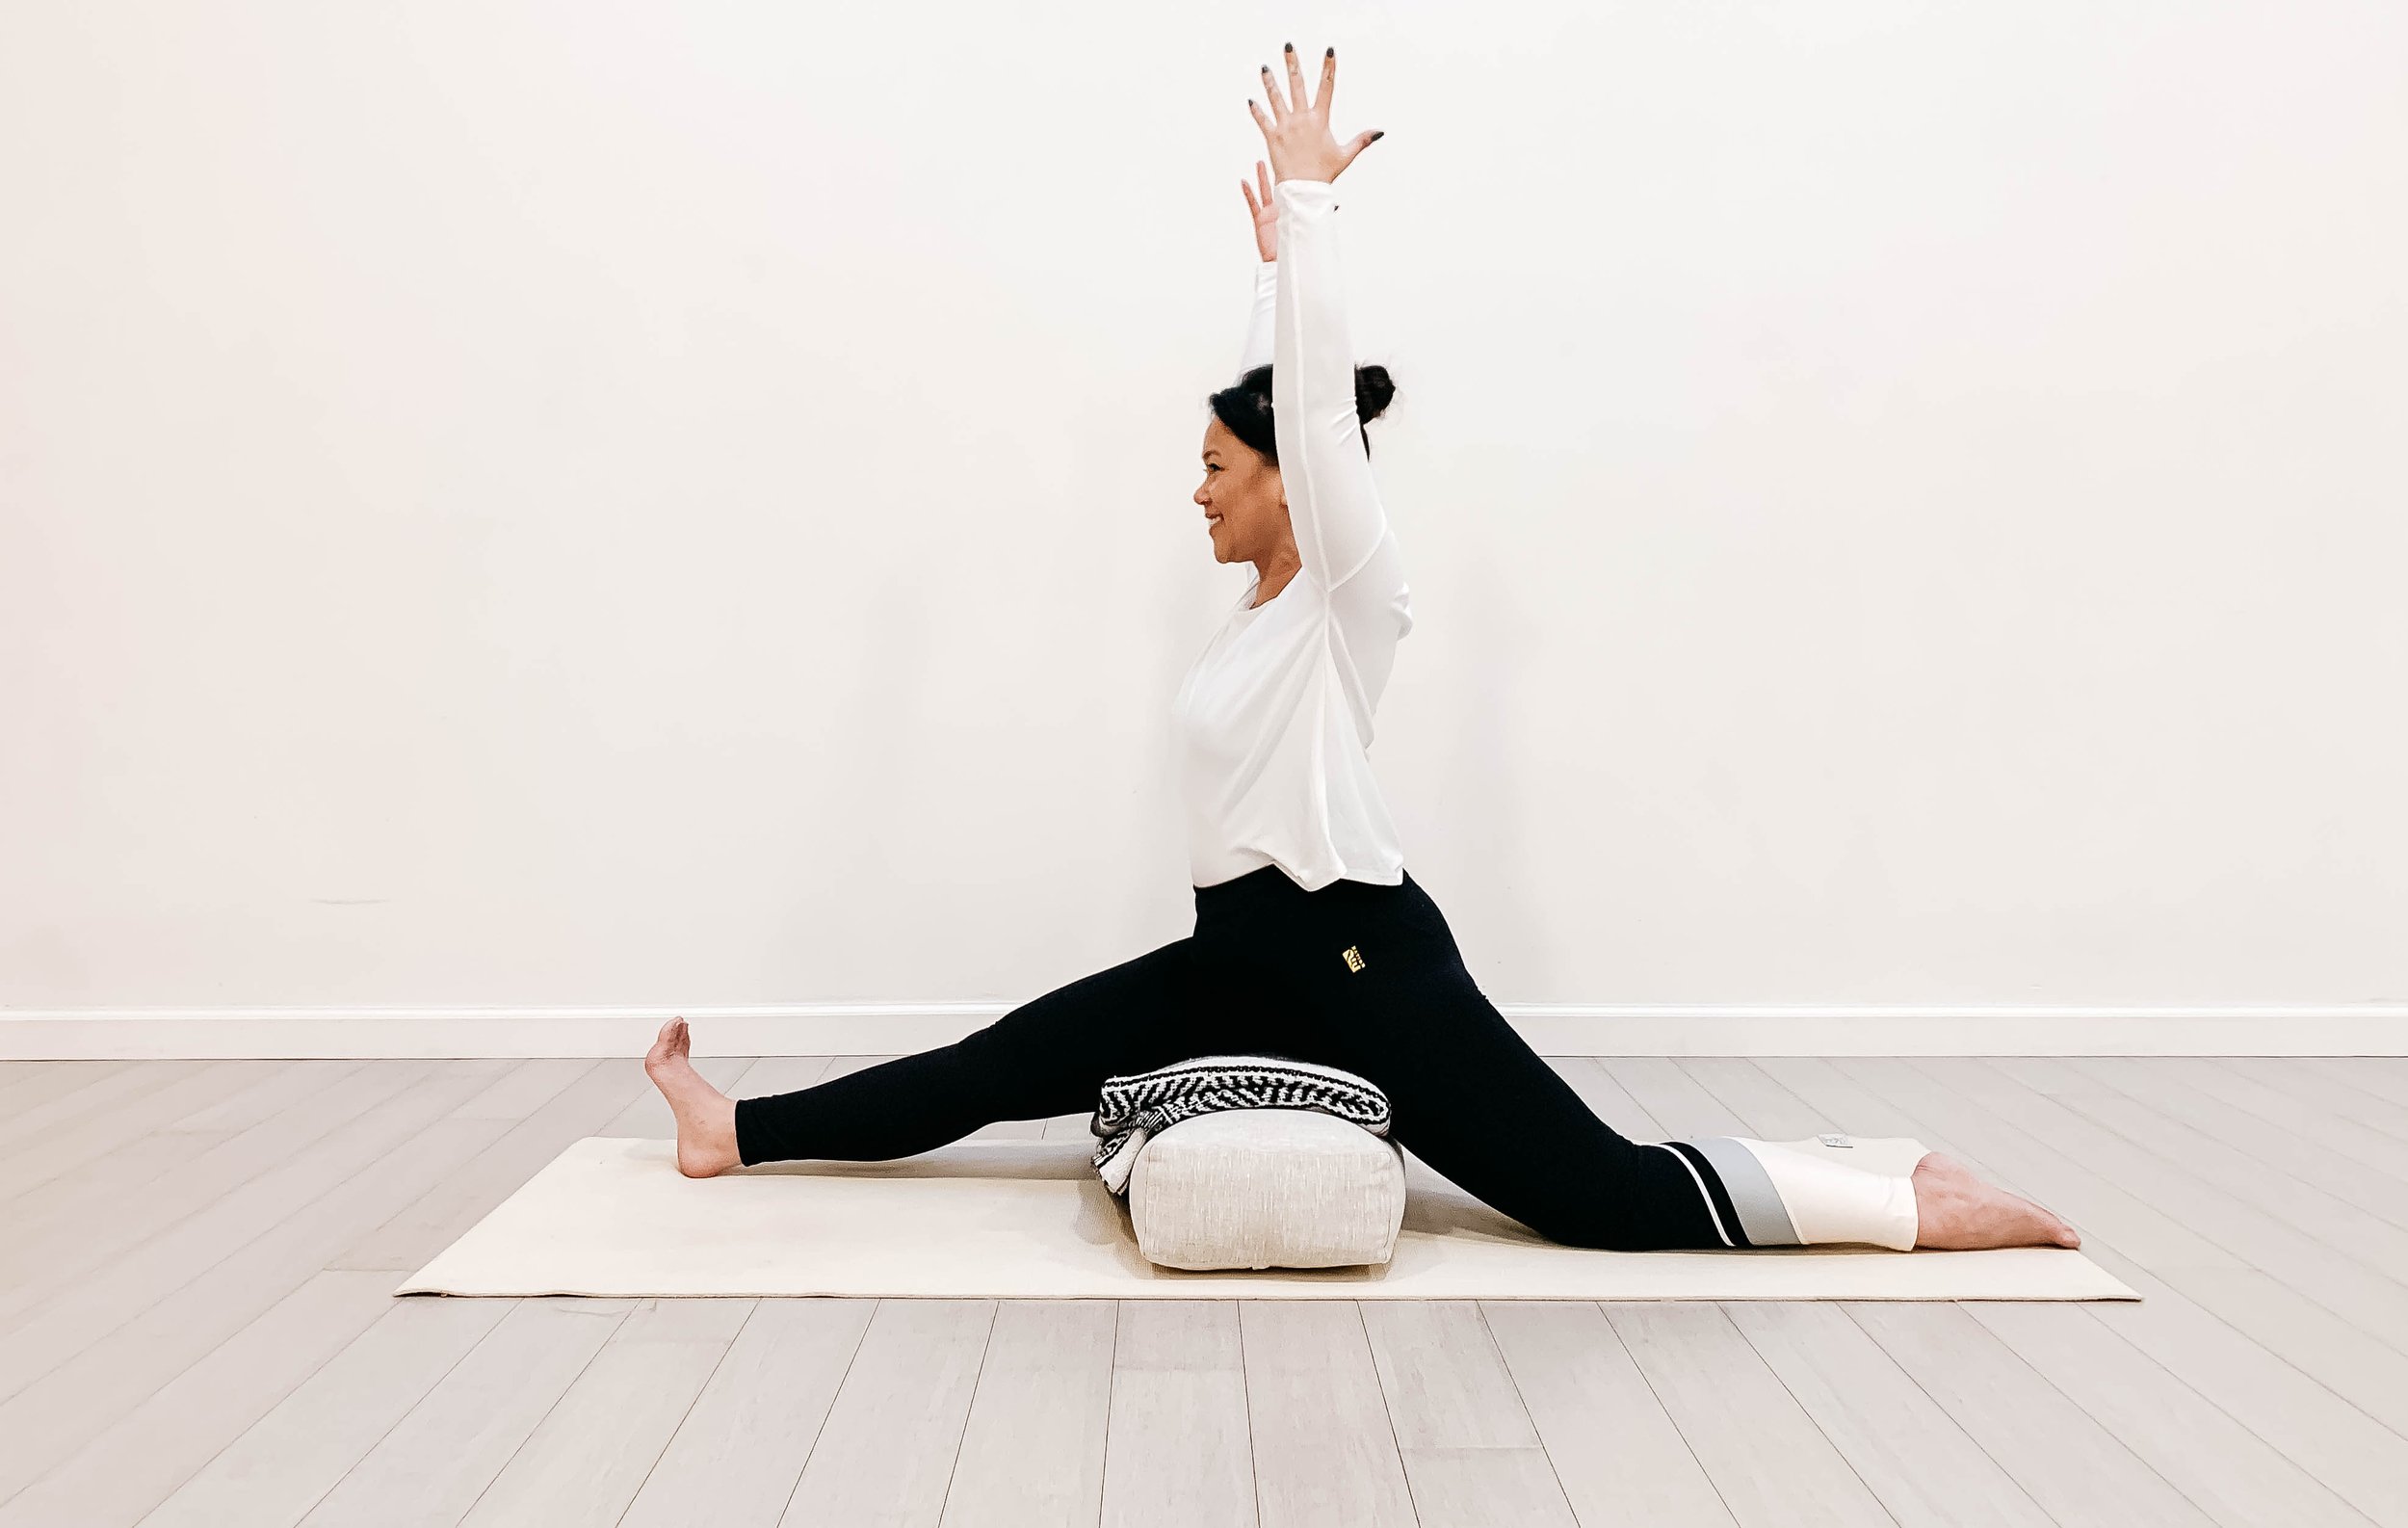
HANUMANASANA

Hanuman* is the name of a monkey-chief, leader of a large troop of monkey-like creatures. His adventures are recounted in detail in one of the two great Indian epics, the Ramayana (pronounced rah-MY-uh-nuh, the other being the Mahabharata), in which he’s an ally of the hero Rama in his war against the demon-king of Lanka, Ravana. The shape of the pose is said to emulate the gigantic leap taken by Hanuman from India to the island of Sri Lanka, where he went to search for Rama’s wife Sita, kidnapped by Ravana. 

His name means “heavy” or “large jaw.” Legend has it that as a baby, he tried to rise up and grab the Sun, which he mistook for a fruit. To prevent this Indra, king of the gods, whacked him on the jaw (hanu) with a thunderbolt, hence the name.

Hanumanasana isn’t a traditional pose. If it looks familiar, that’s because it’s based on what gymnasts call “the splits.” Generally pictures of it show the performer with the back of the front leg and the front of the back leg fully on the floor, which is quite challenging (and possibly injurious if performed improperly or without adequate preparation) for the average student. Fortunately, there are ways to perform the pose after an adequate preparation and using props that make it reasonably accessible to most students.

Here are two basic exercises to help prepare the backs of the legs for the pose. 

1. There are many ways to stretch out the back of the legs, I prefer a kind of modified reclining big toe pose (supta padangushthasana). Make your strap into a large loop, slip it over your torso and snug it into your back armpits. Lie on your back, knees bent, feet on the floor, and with an exhale bring your right thigh into your torso. Hold the shin and press the thigh against your belly, release your lower back to the floor.

2. Slip the loop over the right sole, inhale, and press up through the heel, stop with the knee slightly bent. Snug the belt and clasp your hands on the back of the thigh, just above the sit bone. With your hands, resist the thigh toward the torso, and with an inhale, press your thigh against the resistance of your hands and carefully straighten your knee. Be sure you draw the knee cap toward the hip by contracting the quadriceps, don’t push it into the knee joint. Every time you want to stretch the back thigh a bit more, bend the knee, snug the belt, resist the hands and with an inhale, push into the hands. The head of the thigh bone ideally does (or feels like it does) two things: it sinks deeper into the hip socket (toward the floor), and moves away from the pelvis, deepening the front groin. Essentially you want to straighten the knee by moving its two ends, the femur head and the heel, farther apart.

3. You can keep the left knee bent or straighten the leg. Inhale and push out through the left heel, hold the heel slightly off the floor, turn the thigh inward (so the left toes point slightly right), and press the leg down against the floor. Continue to press actively through the back of the left heel and the base of the big tow. Hold the pose anywhere from 2-3 minutes. Then bend the right knee slightly, remove the right foot from and slip the left foot into the loop and repeat the instructions on the left side.

4. Next stand and go to a wall. Wedge the sides of a block (the middle width) between the topmost back thighs and the wall. The block must be placed precisely at the very top back thighs if this exercise is to be effective. Step your feet away from the wall 8-10 inches so that you’re slightly leaning against the block. Exhale and bend forward into standing forward bend (uttanasana), if the block slips down slightly (or falls), return it to the topmost thighs. Make sure you’re pressing the the top thighs into the block, not simply locking the knees. You can burrow your thumbs into the front hip creases and push back on the femur heads. Every now and then, lift your torso slightly with an inhale, lengthen the front torso, especially between the pubis and navel, and lower back to the full forward bend. Stay 2-3 minutes, then lift up on an inhale with a long front torso.

5. It’s quite possible you’ll need a bit more stretching. You can do Triangle Pose (trikonasana), Intense Side Pose (parshvottanasana), Standing One Leg Raised Pose (urdhva prasarita eka padasana), Wide Leg Standing Forward Bend (prasarita padottanasana), and any of the sitting forward bends you favor.

Now for the front groins. 

6. Take a lunge, right foot forward, knee fixed directly over the heel, left knee on the floor (padded with a blanket), stretched back as far as you like. Keep your torso upright, hands resting on the right thigh. You might want to straighten the right knee slightly, press your right thumb into the hip crease, releasing the outer hip downward, the re-bend the right knee, keep the groin deep.

7. It’s essential, not only for the pose but your own safety, to draw up on the pubic bone and lengthen the tail bone downward. As you slide the left knee back, you’ll feel a tug on your front thigh and groin. The front pelvis may be drawn down, which will compress the lower back. If you feel that happening, back off the lunge, lift the pubis strongly toward the navel, then re-bend keeping the low back long. Stay for 2-3 minutes, if you want a little more, draw the left heel toward the buttock, take hold of the left ankle and pull the heel even closer. Hold 30 seconds to a minute. 

8. Release, press your hands to the floor, right arm outside the leg, and lay the weight of your torso on the right thigh. Inhale, and as you continue to drop the right thigh floor-ward under the torso’s weight, straighten the back knee. Inhale again and straighten the right knee just slightly. Reach the left heel toward the floor, hold the thigh away from the floor, and re-bend the right knee. As you continue to reach through the left heel, lift through the top sternum in the opposite direction. Hold for a minute, then bend the back knee to the floor, and reverse.

9. If you need to stretch more in the front thighs and groins. You can try Side Angle Stretch (parshvakonasana) and virabhadrasana 1. 

Now at last the final pose.

10. You’ll need two firm blankets and depending on your flexibility, a support of some kind, such as a block or bolster. Kneel down on one of the blankets with the other in front of you, whatever support you’re using positioned between the two blankets. Step your right heel forward onto the second blanket (you may have to brace your hands on the floor or on blocks), and VERY SLOWLY begin to slide the left knee back and the right heel forward. Take as much support as you may need, position it right under the topmost right thigh, just where the block was in (4). Do here just what you did at the wall in (4). Press the femur actively against the block and pull up strongly on the pubis toward the navel as you did in (7). Stay for 30 seconds to a minute. 

11. You can press your palms together and rest your thumbs on the sternum in anjali mudra, or you can stretch your arms straight up. When you’re eady to exit, again bring your hands to the floor/blocks, and VERY CAREFULLY slide the left knee forward and the right heel back. Reverse the legs for the same length of time. 

*The proper spellling of the name is Hanumat. The final “t” transforms into an “n” (by the rules of Sanskrit junction) when combined with “asana.” Since most everyone is used to the final-n spelling, we’ll leave it at that to avoid confusion.         

TIP

When you bring the front heel forward, rest the outer edge on the floor with a strong outward rotation of the thigh. This will help release the outer hip of the front leg downward, providing more length along the right side of the torso. When straightening the knee, maintain the release of the outer hip and turn the leg back to neutral by rotating the femur head in the hip socket. Be sure the center (not the inner edge) of the back knee is touching the floor.    

If you want to read an account of Hanuman’s great leap, go here, Book 5, chapter 1:

https://www.wisdomlib.org/hinduism/book/the-ramayana-of-valmiki/d/doc424560.html 


BELIEVE

“It is never too late to be what you might have been.” George Eliot

To paraphrase Mary Oliver, what might do with this precious thing, life? At my age, many friends are grappling with this. Last week, a conversation with one of them hit me hard. After moving through a challenging few years, she is now looking for a purpose, fulfillment… that spark. But where, and how... And what?

Whatever, wherever, however you envision this ‘life’, the message this month is to Believe it can be. Maybe you want to ‘be’ peaceful, more present, more rested. Maybe you want to ‘be’ a teacher, an artist, a volunteer in a country (or neighborhood) torn by strife. Or maybe you want to be exactly what you are, right here and right now.

Maybe you want to ‘be’ in a world that is more loving and inclusive of others? I do.

Whatever it may be, as Ted Lasso tells us, just believe it can be. “I think that’s what it’s all about – embracing change, being brave, doing whatever you have to …”

My 57 yr old sister just finished her master’s in Education, during Covid, toiling over the kitchen table at night while working as an aide in the local school (on Zoom) and raising her teenage daughter as a single mom. Now she is pursuing a career as a 2nd grade teacher. “It is never too late to be what you might have been.” (George Eliot)

So, what’s it gonna be? While this sounds stupidly simple, it’s actually painfully hard. About 8 years ago, I went through this without knowing I was going through this. If this sounds like a riddle, it is - I was truly puzzled.

I broke out in 9 months of unexplained hives that every professional told me was ‘stress’ - but me? Why should I be stressed?

It was in yoga, likely a SmartFLOW class, that I could be still and listen to what my heart was seeking. From there, I needed to strip out the underlying expectations and unwritten do’s and don’ts of my happy life - and take some unconventional steps (bless my husband Bob- he did his share of eye rolling, but he hasn’t given up on me...yet). The most important thing I learned? It is actually the journey, each seemingly insignificant step along the way that even for a moment fills your cup, and not the destination, that brings contentment. Because, what is the ultimate ‘destination’ anyway? I daresay contentment?

So, I invite you to zero in on whatever it is that lights you up (or calms you down)... and dip in your toe. Is it painting? Growing vegetables? Learning anatomy? Spoiler alert, it may not be popular with those around you. You may need to do less of something (for me it was cooking dinner..) or more of something else - and over time, you risk leaving some of the current regulars in your life behind. The first step, while scary, is actually harmless - my whole family laughed when I brought home my first crystal and put it out under the full moon.

But don’t give up... as Mark Twain said, “Courage is resistance to fear, mastery of fear, not absence of fear.” Yes, it’s scary! But that first trip to the crystal shop is not that awful, trust me.

Sit down, maybe turn on some music, be still. And take a look deep inside...maybe write about it, think on it… but notice it. And trust it. Believe in it. Because, the first step is believing in yourself.

_____________________

Rebecca: “Oh, do you believe in ghosts, Ted?”

Ted Lasso: “I do. But more importantly, I believe they need to believe in themselves.”